Follow Me On Social Media!


Kitchen Sink Cookies: The Ultimate Indulgent Treat Adventure
Introduction to Kitchen Sink Cookies
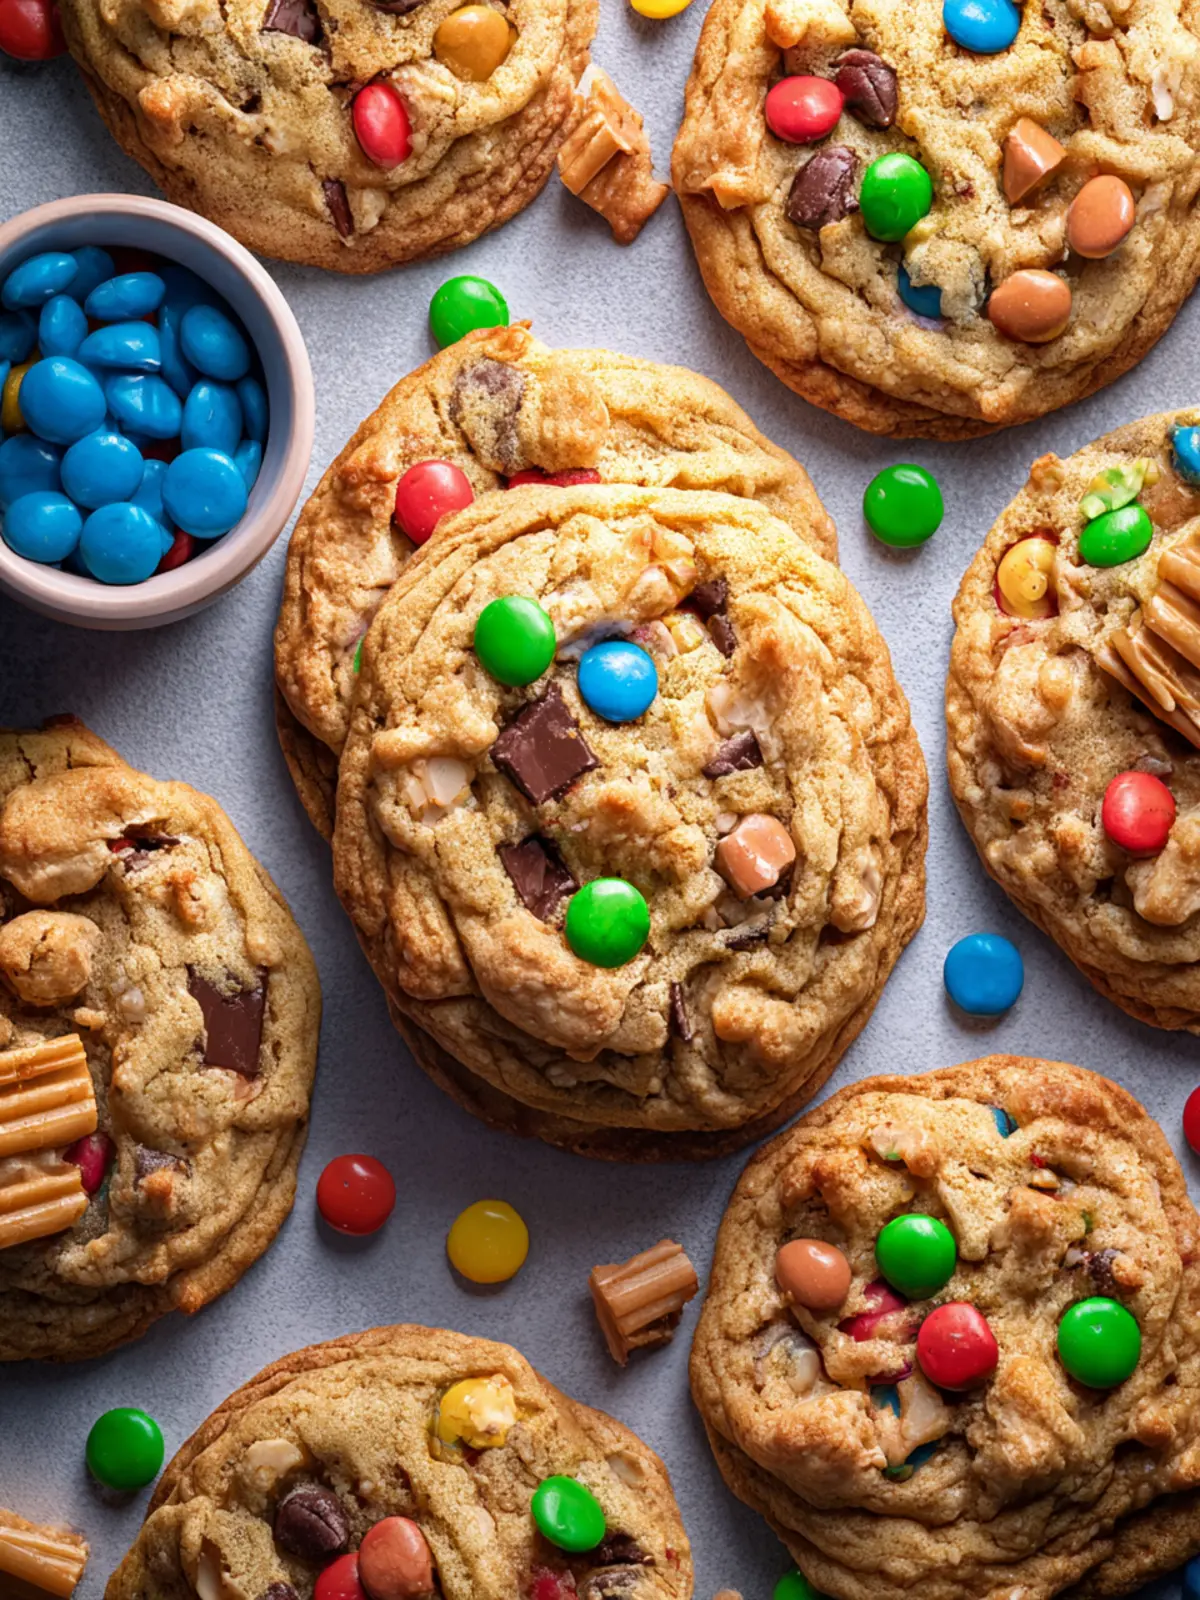
Imagine a cookie that embodies the carefree spirit of a well-stocked kitchen, bursting with flavors and textures that seem to celebrate everything you love about baking. Kitchen sink cookies are just that—whimsical confections that throw in a little bit of everything, making them a favorite among cookie lovers. It’s a delightful approach to baking that encourages creativity; after all, who doesn’t like a cookie that’s made with love and whatever treasures are hiding in the pantry?
These cookies are a blend of sweet and salty, chewy and crunchy, thanks to the variety of mix-ins you can choose. Common ingredients often include chocolate chips, nuts, dried fruits, and even a sprinkle of pretzels for an unexpected twist. The beauty of kitchen sink cookies lies in their versatility; feel free to customize them to your tastes or whatever ingredients you happen to have on hand. Whether you’re indulging your sweet tooth or serving up a batch for a gathering, there’s something undeniably irresistible about these treats.
What are Kitchen Sink Cookies and Why Are They So Irresistible?
So, what makes kitchen sink cookies stand out among other cookie recipes? For starters, they cater to every craving in one bite, offering a satisfying combination of textures and flavors. Each cookie serves as a little edible adventure where you never quite know what you’ll get. One bite might reveal gooey chocolate, while the next surprises you with a salty crunch from crushed pretzels.
The secret to their charm lies in their adaptability. You can easily swap ingredients based on dietary preferences or pantry supplies. Want to make them gluten-free? Use a gluten-free flour blend. Looking for a nut-free version? Just leave out the nuts and add in more chocolate chips or oats. The possibilities are endless!
The experience of creating kitchen sink cookies feels more like a family event than a solitary baking session. Picture yourself surrounded by friends, tossing in ingredients as you share stories and laughter. The smell that fills your home as they bake? Pure bliss. So, whether you’re baking for yourself, friends, or family, kitchen sink cookies promise joy in every batch.

Key Ingredients for Kitchen Sink Cookies
Kitchen sink cookies are all about incorporating a little bit of everything to create a scrumptiously unique treat. Let’s explore what makes these cookies so special!
Butter: The star of this recipe, melted and slightly cooled butter lends a rich texture, ensuring every bite is perfectly indulgent.
Sugars: A blend of light brown sugar and granulated sugar not only boosts sweetness but also adds a delightful complexity to the flavor, making each cookie truly memorable.
Eggs: For optimal chewiness, using one large egg along with an additional yolk at room temperature is key. This combination guarantees a tender crumb while beautifully binding everything together.
Vanilla Extract: A splash of vanilla takes these kitchen sink cookies to the next level, enriching the flavors and making them feel extra special.
All-Purpose Flour: This ingredient is essential for structure. Sifting the flour beforehand provides a lighter texture, resulting in cookies that are ever so delightful.
Baking Soda: Acting as a leavening agent, baking soda ensures that your cookies rise to just the right height, achieving a satisfying bite.
Kosher Salt: A pinch of salt works wonders, balancing out the sweetness and enhancing the overall flavor profile.
Pretzels & Potato Chips: These add unexpected crunch and a salty contrast, creating an exciting texture that keeps you reaching for more!
Chocolate Chips, Caramel Chips & Mini M&Ms: Bursts of sweetness come from these delightful additions. They transform each cookie into a dynamic taste experience that’s hard to resist.
Why You’ll Love Kitchen Sink Cookies
When we talk about kitchen sink cookies, they truly embody the spirit of creativity and indulgence. Picture this: a single cookie packed with all your favorite treats, from rich chocolate chips to crunchy nuts. It’s a delightful surprise in every bite and the perfect excuse to clean out your pantry!
-
Endless Variety: These cookies are the ultimate canvas for your imagination. You can mix in whatever you have on hand—think dried fruits, candies, or even sprinkles. It’s a delicious way to try new combinations and showcase your personal taste.
-
Perfect for Sharing: Whether you’re hosting a get-together or just want to make friends at the office, kitchen sink cookies are a surefire hit. They’re generous in size and flavor, making them perfect for sharing with loved ones or colleagues.
-
Easy to Bake: Don’t worry if you’re not a baking pro. The beauty of kitchen sink cookies lies in their simple method. Mix, scoop, and bake—it’s that easy!
-
Nostalgic Comfort: These cookies can evoke childhood memories of baking with family, making them more than just a sweet treat; they’re a connection to the past.
So gather all your favorite ingredients and start baking your batch of kitchen sink cookies today—they’re sure to become a cherished favorite!
Variations for Kitchen Sink Cookies
Different Chips and Mix-Ins
What makes kitchen sink cookies so delightful is their ability to embrace a myriad of flavors and textures. You can easily customize these cookies by mixing in your favorite ingredients. Try experimenting with:
- Chocolates: Swap out semi-sweet chocolate chips for dark, white, or even butterscotch chips. Each will impart a unique sweetness and richness.
- Nuts: Walnuts and pecans add a lovely crunch, while macadamia nuts can elevate a tropical vibe.
- Dried Fruits: Consider adding raisins, cranberries, or even chopped apricots for a fruity twist.
- Snack Add-Ins: Crushed pretzels or potato chips can bring a perfect salty contrast, making your kitchen sink cookies irresistibly savory and sweet.
Dietary Modifications
Adapting kitchen sink cookies for dietary preferences is a breeze. Whether you’re gluten-free, dairy-free, or vegan, there are simple swaps available:
- Gluten-Free: Use a 1:1 gluten-free flour blend for a similar texture without gluten.
- Dairy-Free: Substitute butter with coconut oil or a plant-based butter alternative. Just make sure to adjust the melting point in your baking.
- Vegan: Replace eggs with flaxseed meal or applesauce. Each offering brings moisture and binding without animal products.
These variations ensure that everyone can indulge in the joy of freshly baked cookies!
Cooking Tips and Notes for Kitchen Sink Cookies
Best Practices for Delicious Kitchen Sink Cookies
Creating kitchen sink cookies is an adventurous journey into cookie-making! For the best results, start with measuring your ingredients accurately; precision can make a world of difference. Here are some best practices to consider:
- Room Temperature Ingredients: Bring eggs and butter to room temperature. This helps achieve a nice, creamy batter and ensures even mixing.
- Mixing: Be cautious when mixing your dough. Over-mixing can lead to tough cookies. Mix until just combined to keep them soft and chewy.
- Baking Time: Keep an eye on your cookies as they bake; they should be golden around the edges but still soft in the center. Remember, they’ll continue to cook slightly after you pull them out!
Storage Tips for Maintaining Freshness
Storing your kitchen sink cookies properly keeps them fresh and delicious for longer. Follow these tips:
- Cooling: Allow cookies to cool completely on a wire rack before storing. This prevents condensation and maintains texture.
- Containers: Use an airtight container to keep them fresh. Layer cookies between sheets of parchment paper if you’re stacking them to avoid sticking.
- Freezing: For longer storage, freeze baked cookies in a zip-top bag. They can last for up to three months! Just thaw them at room temperature for an instant treat.
By following these tips, you can enjoy your kitchen sink cookies at their best!

Serving Suggestions for Kitchen Sink Cookies
Enjoying kitchen sink cookies opens the door to creative serving possibilities that may surprise your taste buds. These cookies, packed with a delightful mix of sweet and savory ingredients, beg to be paired with the right beverages and showstopping presentations.
Pairing with Beverages
Finding the right drink to accompany kitchen sink cookies can elevate your snack time to new heights. Consider these delightful combinations:
- Milk: A classic pairing, the creaminess of milk complements the rich flavors and add-ins in the cookies.
- Coffee: The acidity and warmth of coffee bring out the chocolate and nutty notes, making for a perfect afternoon treat.
- Tea: Opt for a milder herbal tea like chamomile or a fruity blend that highlights the sweetness of the cookies.
- Hot Chocolate: For a decadent pairing, serve alongside a cup of hot chocolate for an indulgent dessert experience.
Presentation Ideas
First impressions matter, and your cookie platter deserves some extra love. Here are some ideas to make your cookie spread truly shine:
- Colorful Liners: Use bright cupcake liners to add vibrancy and personality to your cookies.
- Serving Board: Arrange the cookies on a rustic wooden board for a homey touch.
- Garnishes: Scatter some of the cookie mix-ins, like chocolate chips or nuts, around the platter for a fun and inviting appeal.
- Labeling: Consider labeling different cookie varieties if you’ve made several versions to spark curiosity and engagement among your guests.
These serving suggestions can turn your kitchen sink cookies into an even more enjoyable experience for friends or family!
Timetable for Kitchen Sink Cookies
Creating the perfect batch of kitchen sink cookies isn’t just about throwing everything into a bowl. It’s a delightful process that involves timing! Here’s a breakdown of your delicious cookie journey:
Preparation Time
Getting started is half the fun! Allocate 15 minutes to gather ingredients, mix them, and prepare your baking sheets. This is when you can let your creativity shine by choosing your mix-ins.
Baking Time
Once the dough is ready, pop those trays in the oven! Baking time is approximately 10-12 minutes. Keep an eye on them as you want a slight golden-brown edge combined with a chewy center.
Cooling Time
After baking, patience is key. Allow your kitchen sink cookies to cool on the baking sheet for about 5 minutes. This helps them firm up before transferring to a wire rack to cool completely.
Total Time
From start to finish, your adventure in baking kitchen sink cookies will take approximately 30-35 minutes. Perfect for an afternoon treat or surprise guests! Enjoy every bite!
Nutritional Facts for Kitchen Sink Cookies
Every bite of kitchen sink cookies feels like a delightful, nostalgic treat, but what about their nutritional profile? Let’s break down the facts to help you understand what makes these cookies delicious yet balanced.
Calories
In a serving of kitchen sink cookies, you can expect to consume around 150 calories. This makes them a sweet indulgence that’s perfect for satisfying those late-night cravings.
Protein
Each cookie packs about 2 grams of protein. While they aren’t a major source, the protein from ingredients like eggs and nuts contributes to overall nutrition, lending them a more filling quality.
Carbohydrates
With approximately 20 grams of carbohydrates per cookie, these treats are great for a quick energy boost during your busy day. The blend of oats, chocolate, and sugar provides both complex and simple carbs, ensuring a gradual energy release.
Sugars
Each kitchen sink cookie contains about 10 grams of sugar. While this might sound high, the balance of ingredients keeps them from being overly sweet, appealing to those who appreciate a treat without the sugar overload.
Understanding the nutritional facts can make enjoying these cookies even more satisfying, knowing you’re treating yourself wisely!
FAQs about Kitchen Sink Cookies
Kitchen sink cookies are an adventurous treat, inviting an array of flavors and textures—all in one bite. They embody the spirit of creativity in baking, allowing you to throw in whatever ingredients you have on hand for a delicious and chewy cookie. If you’re curious about making the most of your kitchen sink cookies, here are some commonly asked questions to guide you.
Can I freeze the cookie dough?
Absolutely! Freezing cookie dough is a fantastic way to enjoy fresh cookies anytime. Simply scoop the dough into balls and place them on a baking sheet. Once frozen, transfer the balls to an airtight container or freezer bag. When you’re ready to bake, simply add a few extra minutes to the baking time for perfectly baked kitchen sink cookies.
How do I know when the cookies are done baking?
A surefire way to check for doneness is to look for a golden-brown edge, while the center should still look slightly soft. Cookies continue to cook on the baking sheet after you remove them from the oven, so pulling them out while they still have that soft appearance ensures a chewy texture.
What if I don’t have certain ingredients on hand?
Flexible baking is the name of the game with kitchen sink cookies! If you’re missing an ingredient—like chocolate chips or nuts—feel free to swap in similar items, such as dried fruit, oats, or even crushed pretzels. The beauty of this recipe lies in its adaptability.
How can I make these cookies healthier?
For a healthier spin on kitchen sink cookies, you can substitute some of the all-purpose flour with whole wheat flour or oats. Reducing the sugar slightly or switching to healthier sweeteners, like coconut sugar, can also help. And don’t forget to add nuts or seeds for an extra boost of nutrition!
Conclusion on Kitchen Sink Cookies
As we wrap up our exploration of kitchen sink cookies, it’s clear that these delightful treats are all about creativity and flexibility. They invite you to toss in your favorite ingredients, making each batch uniquely yours. Whether you’re craving a mix of chocolate, nuts, or even a dash of sea salt, the process is both fun and rewarding. Plus, they’re perfect for sharing, making you the star of any gathering. So next time you need a sweet treat, remember the joy of kitchen sink cookies—you’ll savor each delicious bite, and your friends will thank you for it!
Print
Sweet and Salty Cookies
- Total Time: 35 minutes
- Yield: 24 cookies 1x
- Diet: Vegetarian
Description
A delicious combination of sweet and salty flavors in a cookie.
Ingredients
Scale
- ¾ cup unsalted butter (melted and cooled slightly)
- 1 ¼ cups light brown sugar
- ¼ cup granulated sugar
- 1 large egg (at room temperature)
- 1 large egg yolk (at room temperature)
- 1 tablespoon vanilla extract
- 3 cups sifted all-purpose flour
- ½ teaspoon baking soda
- ¼ teaspoon kosher salt
- ½ cup pretzels (broken into pieces)
- ½ cup potato chips (lightly crushed)
- ¼ cup semi-sweet chocolate chips
- ¼ cup caramel or butterscotch chips
- ¼ cup mini M&Ms
Instructions
- Preheat oven to 325F. Line baking sheets with parchment paper. Set aside.
- In a large bowl, whisk butter and sugars together until well combined.
- Whisk in egg, egg yolk, and vanilla until combined.
- Add flour, baking soda, and salt. Use a rubber spatula to mix again until just combined.
- Add pretzels, potato chips, chocolate chips, caramel chips, and mini M&Ms. Mix until just incorporated. You may need to use your hands to mix it in if that’s easier.
- Scoop ¼ cup of batter at a time and form into balls. Place on the baking sheets about 3 inches apart. Lightly flatten each ball with your hand.
- Top with additional pretzels, chips, chocolate chips, or M&Ms.
- Bake for about 15-20 minutes, or until edges of the cookies are lightly browned and middles are just set.
- Let cookies cool completely on the baking sheet before removing.
Notes
- Using different types of pretzels or chips can change the flavor profile.
- For chewier cookies, do not overbake.
- Prep Time: 15 minutes
- Cook Time: 20 minutes
- Category: Dessert
- Method: Baking
- Cuisine: American
Nutrition
- Serving Size: 1 cookie
- Calories: 200
- Sugar: 10g
- Sodium: 150mg
- Fat: 8g
- Saturated Fat: 5g
- Unsaturated Fat: 3g
- Trans Fat: 0g
- Carbohydrates: 30g
- Fiber: 1g
- Protein: 2g
- Cholesterol: 30mg